

Phonics Fun with Word Families
(please note that this post includes affiliate links. Read my full disclosures here.)
You must be teaching a little person to read. What a fun, though demanding job!
Once your little person knows the names and sounds of all of the consonant letters, and at least the short sound of the vowels, he can successfully read a whole lot of words! Hooray! Phonics!
I created my first ‘Word Family House’ for my oldest daughter, when she was 4-years-old. She’s now 21! I never laminated it because I didn’t own a laminator at the time, so it was in tatters when it was time to teach my youngest.
(Speaking of laminators, this is the one I bought several years ago. Talk about a bargain! I laminate every. single. thing. all. the. time and it’s still going strong. I love that it’s wide enough to laminate a file folder.)
So since ours was in tatters, I needed to create a new ‘Word Family House’ to teach my youngest phonics. I figured I might as well create it digitally so I could share the printable with all of you. You can download the file below.
This house is mainly CVC words (consonant-vowel-consonant) and is geared to VERY new readers. It will help build your new reader’s confidence and excitement about reading. My youngest helped choose the colors and is gaga over her pretty new ‘Word Family House’. Your child will probably zip through them willingly, too. Flashcards are for the birds!
I did include a few blends and digraphs at the end of certain letter strips. You can skip those or save them for later.
To assemble the phonics word family houses, follow these steps:
1. Print all 4 pages of the document on cardstock. Here’s what your download will look like:
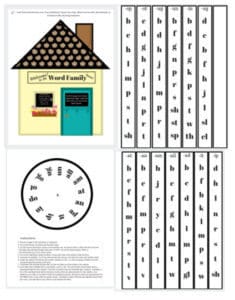
2. Cut out the house, the wheel, and the letter strips.
3. Cut slits across the bottom and top of the window ONLY. An exacto knife or utility knife will work best. The letter strip will feed through these slits. Do NOT cut out the whole window. Refer to the photo.
4. Cut out the window inside the door (the solid black square) entirely. You want the whole square gone, unlike the slits you cut earlier.
5. Laminate for durability. You’ll have to recut the window slits after laminating, but leave the clear door-window intact. Since you cut out the window before laminating, you’ll have a nice clear window, like this:
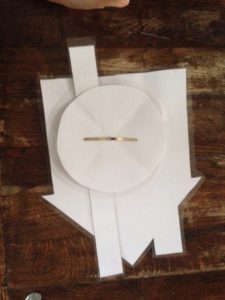
6. Fasten the wheel to the house with a brad, centered on the x, so that one group of letters shows through the window in the door.
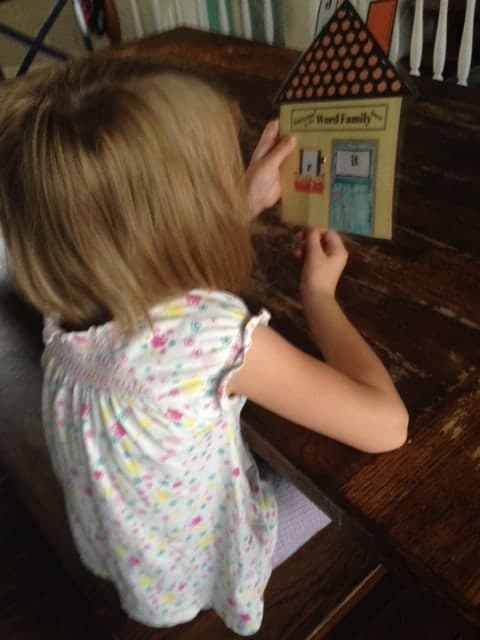
7. Feed letter strip through window slits, so that one letter at a time shows in the window. This is what the back will look like.
8. Each letter strip is labeled with a word family across the top, such as -am. The word family of each letter strip should match what is showing through the door-window. Feel free to practice with non-matching strips as well. A few of the resulting words will be nonsense words (not actually words) which are great practice for new readers. Just explain your method to your child, so he doesn’t think he’s reading incorrectly.

Pin this phonics word families printable activity for later!


Thanks for the wonderful printable!
Thanks for this creative idea! I’ve been looking for different ways to help my daughter with reading over the summer I’m excited to try this with her.
Have fun! 🙂
This is adorable! I’ll have to keep this in mind when my son is a bit older and starts reading! So cute!
Thanks! It was fun to make.
This is such a cute printable! Pinned to my homeschool board. I’m excited to use it with my next little reader!
Thanks for pinning it! I’m glad you’ll be able to use it!
I Love this idea! and now I want a laminator lol
going to show this to my daughter who has taught all her children to read and still has some to go. She is always looking for new ways to engage them.